Last updated November 17, 2026



Free written scope consultation - allowances, timeline, and change-order rules on paper before a single trade is scheduled
Driveway & Pavers Troubleshooting: Common Problems and How to Fix Them
If you’ve re-sanded the same low spot twice in three years, you haven’t fixed the driveway – you’ve been feeding a drainage problem that’s quietly eating your base. That’s the pattern we see most in Fremont: a homeowner patches a dip every spring, and the dip comes back by fall, a little wider each time. Nine out of ten paver problems people try to fix themselves are symptoms, not causes. Patching a sunken section without fixing the water underneath just moves the problem two feet to the left. This guide teaches you to read what your pavers are telling you – where the damage sits, how it feels underfoot, what color the stains run – before you spend a dollar on repairs. By the end you’ll know which fixes are real and which are just buying time.
Quick Answer
Most driveway paver problems come down to water, base, or restraint – not the pavers themselves. Sunken or rocking pavers usually mean a failing base or trapped moisture, cracks at the edges usually mean a failed edge restraint, and white powdery stains are usually harmless efflorescence rather than structural damage. Fix the cause (drainage and base), not just the surface, or the problem returns.
Styles & brands we work with
- Kitchen remodeling
- Bathroom remodeling
- Home additions & ADU
- Roofing
- Windows & doors
- Driveway & pavers
- Fence
Table of Contents
- How to Read What Your Pavers Are Telling You
- Edge Failure vs. Field Failure: Location Tells the Story
- The Screwdriver Test for Base Integrity
- Efflorescence vs. Stains That Actually Matter
- Why Pavers Sink and Rock (and How to Fix It Right)
- Cracks, Heaves, and Shifting Joints
- Matching Replacement Pavers to Aged Originals
- The Written Change-Order Rule for Repairs
How to Read What Your Pavers Are Telling You
A driveway is a system, not a floor. The pavers on top are just the visible layer sitting on a compacted base, held at the edges by some form of restraint. When something goes wrong, the pavers move – and where they move tells you which layer underneath failed. Before you pick up a tamper or a bag of sand, spend ten minutes reading the damage.
Here’s what to look at, in order:
- Where is the damage? Along a straight edge, at the driveway entrance, or against the garage slab – or out in the middle of the field.
- What does it feel like? Step on each paver. A hollow or rocking feel means the base under that paver has lost contact.
- When does it appear? After rain, after a dry spell, or after a heavy truck pulled in. Seasonal timing points straight at water.
- What color is the staining? White haze, dark damp patches, or rust streaks tell three different stories.
- Has it moved before? A spot that’s been patched twice is a drainage problem wearing a disguise.
In Fremont, we see this most on driveways that slope toward the garage without a proper channel drain – the winter rain pools at the low corner, softens the base, and by March that corner is a bowl. Read the clues first and you’ll save yourself the cost of fixing the wrong thing. If you want the full picture on installation and materials for our area, our Driveway & Pavers in Fremont page walks through it.
Edge Failure vs. Field Failure: Location Tells the Story
Almost every paver problem is either an edge failure or a field failure, and the two have different causes. Get this distinction right and you’ve solved half the puzzle.
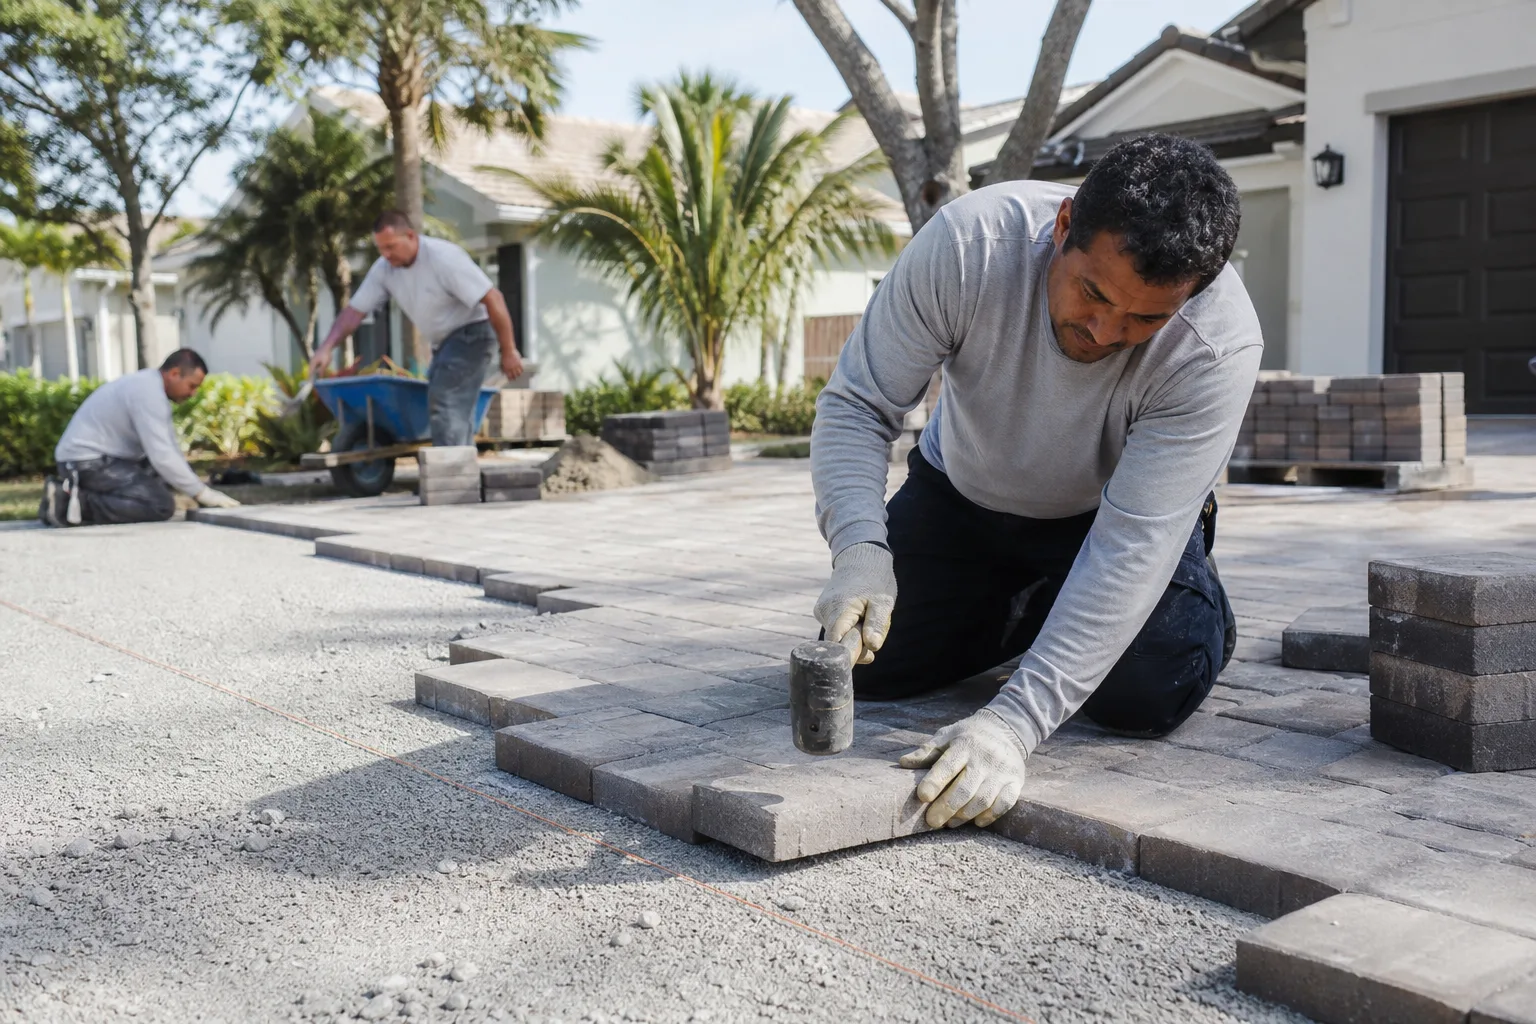
Edge failure happens along the perimeter – the driveway entrance, the side bordering the lawn, or where the pavers meet the garage slab. The pavers nearest the edge start to spread, tilt, or separate. Nine times out of ten, that’s a restraint problem: the edge restraint (often a plastic or concrete curb, or a soldier course) has shifted, sunk, or was never deep enough. The bedding sand beneath those edge units washes out, and the pavers lose their grip. A missing or shallow restraint is the culprit far more often than the pavers themselves.
Field failure happens out in the middle of the pavement, well away from any edge. Pavers sink, heave, or rock in the interior. That points to drainage or base: water trapped under the pavers, a base that wasn’t compacted to depth, or an underground leak (an irrigation line is a common one). Patching the surface of a field failure without addressing the base is the DIY trap that keeps eating money.
- Edge failure signs: pavers spreading at the driveway mouth, a soldier course leaning out, gaps widening along one side.
- Field failure signs: a bowl-shaped dip in the middle, several pavers rocking together, heaving after rain.
- Mixed failure: a field dip next to an edge that’s pulled away – often one drainage problem doing both.
We’ve seen plenty of both in Fremont, especially on older driveways near the Niles district where original base depths were often shallower than what we’d build today.
The Screwdriver Test for Base Integrity
You can learn a lot about what’s under a sunken paver without lifting it. The screwdriver test tells you whether a dip is a surface fix or an excavation job.
- Pick the lowest paver. Find the paver sitting furthest below its neighbors.
- Wiggle it with your hand. If you can lift an edge with fingers alone, the base underneath is gone – this is not a sand-topoff fix.
- Push a flathead screwdriver into the joint sand. Gently work it down beside the paver. If it slides in easily for an inch or more, the sand is loose and washed out.
- Lift one paver and look. If the paver sits in a pocket of loose sand with a soft, wet base below, water is channeling under it. If it sits on firm, tight base with intact bedding, the problem is local.
- Check the feel after a rain. A base that goes soft after rain is a drainage failure, not a settling one – and re-sanding won’t fix it.
One caution: don’t go digging out a deep section to chase the problem. A paver that sits on a soft, saturated base can hide a bigger water issue, and poking around can undermine the pavers beside it. That’s a job to look at with a trained eye. Our crews have up to 28 years of experience reading base and drainage, which is often the difference between a real fix and a patch that lasts one season.
Efflorescence vs. Stains That Actually Matter
The white, chalky haze that shows up on pavers is called efflorescence. It looks alarming and it scares a lot of homeowners into thinking the pavers are failing. In almost every case, it doesn’t mean structural trouble – it’s mineral salts migrating to the surface as moisture moves through the concrete pavers and evaporates. It brushes off, fades with weather, and can be cleaned. It’s a cosmetic nuisance, not a failure.
Two stains that do matter:
- Dark, damp patches that never dry: a persistent dark spot at the base of a slope or beside the garage means moisture is trapped under the pavers. That’s a drainage flag, and it precedes sinking.
- Rust-colored streaks: usually from steel edging, rebar, or buried metal degrading underneath – which means the subgrade is holding water against something metal. That needs investigating, not wiping down.
Efflorescence tends to peak in Fremont during the wet winter months, when moisture moves through the pavers constantly and then dries in the sun. It fades as the weather dries out. If the white haze keeps coming back in the same spot year after year, and that spot stays damp, treat it as a moisture clue rather than a stain. A basic bag of Quikrete or Sakrete joint sand does nothing for the cause – it only fills the joints.
Why Pavers Sink and Rock (and How to Fix It Right)
Sinking and rocking are the most common complaints we hear in Fremont, and they almost always trace back to the base. A paver installation is only as good as the compacted aggregate and bedding sand underneath, and that base is what takes the load. When the base is too shallow, poorly compacted, or saturated, the pavers lose support and start to move.
The fixes, in order of how permanent they are:
- Reset a single paver: lift it, re-level the bedding sand, tamp, and set it back – fine for one loose unit from a minor cause.
- Re-sand joints: top off the joint sand to lock the field – but only after the base is sound. Re-sanding over a failing base just hides the dip.
- Rebuild the bedding and base section: remove the affected pavers, dig out the soft base, re-compact in lifts, and re-lay. This is the real fix for a field failure.
- Fix the drainage: add a channel drain, regrade the slope, or correct a downspout that dumps onto the driveway. No base will survive water it can’t shed.
If a sunken section sits next to a downspout or a downhill slope, the drainage fix comes first. Otherwise the new base will sink the same way. Our team installs Belgard and Cambridge Pavers hardscape systems, and the base work under them matters more than the paver brand on top.
Cracks, Heaves, and Shifting Joints
Cracks in pavers themselves are less common than cracks in poured concrete, but they happen – usually from a point load (a heavy vehicle, a dropped weight) or from the pavers being too thin for the traffic. A cracked paver is a replace-the-unit job, not a repair-the-crack job.
Heaving is different. When a section of pavers lifts up rather than sinks, water is the usual cause: a freeze-thaw cycle, but more often in Fremont, a saturated base swelling, or tree roots pushing from below. You’ll also see joints shifting – the sand working out of the joints, the pavers riding slightly proud and loose.
- Cracked paver: replace the unit and check the base beneath it for soft spots.
- Heaved section: find and fix the water source; reset the pavers after the base has dried.
- Widening joints: re-sand with a proper polymeric or joint sand and re-check the edge restraint.
- Root heaving: remove the offending root or reroute the paver edge – don’t just pound the pavers flat.
On a Fremont driveway that sees both wet winters and dry summers, joints move a little with the seasons. Small movement is normal; a joint that widens every year is a clue about the base below.
Matching Replacement Pavers to Aged Originals
Here’s a counterintuitive one: a perfect-match replacement paver can make a repair look worse than the damage did. Pavers age – they weather, they darken, they pick up a patina. A brand-new unit dropped into a weathered field stands out like a fresh coat of paint on one wall.
How to handle the match:
- Find the original brand and color if you can. Cambridge Pavers and Oldcastle are common, and knowing the exact line matters most. Look at the underside of a lifted paver or on the paver packaging.
- Accept a close match, not a perfect one. A slightly off shade, weathered in over a season or two, reads better than a stark new unit.
- Blend new pavers into the field. Place replacement units where they’re less prominent (out of the main sightline, away from the entrance) and rotate position so they don’t form a noticeable square.
- Let them weather. A new paver takes a season to settle into the same tone. Don’t panic on day one.
Sometimes the honest answer is that the repair looks like a repair – and that’s fine. A well-matched fix that holds for a decade beats a perfect color match on a bad base that sinks again in six months. Our crews have replaced enough pavers in Fremont to know when a close match is the right call.
The Written Change-Order Rule for Repairs
Here’s the single most important protection you have as a homeowner: if a contractor finds base that’s “worse than expected” mid-repair and starts digging deeper without showing you a written price first, that’s a red flag. Not a little one. A big one.
Surface repairs are predictable. But a paver repair can turn into a base rebuild once the pavers come up – and that’s a real cost. The right way to handle it is a written change order: the scope, the price, and the reason, on paper, signed off before a single extra shovel goes in the ground. No surprise invoice at the end.
This is how we work at Barrett & Sons Construction. Every scope, every allowance, every price change arrives as a written change order before work happens – because an allowance that isn’t on paper is a surprise waiting for a date. And if a repair turns into a bigger job, you hear it from us in writing, not on the final bill. Every eligible job also has permits pulled and inspections signed, because the permit inspector works for you, not for us. Our 90-Day Done Right Promise backs the work in writing: if it isn’t done right, one call brings the crew back to make it right. For a free second opinion on any written estimate, we’re happy to take a look. Our full range of work starts from Barrett & Sons Construction Fremont home, and if a failing paver job has you thinking about fencing for the yard or a bigger hardscape upgrade, we handle Fence Installation in Fremont and Home Additions & ADU in Fremont as well.
How to Prevent Paver Problems in the First Place
Most paver repairs we see in Fremont trace back to something that was preventable at installation or in how the driveway is maintained. A few habits keep a driveway in good shape for decades.
- Keep the joints full. Re-sand joints every couple of years, before the sand drops below the paver surface. Empty joints let water in and let pavers wander.
- Route water away. Make sure downspouts, gutters, and grading push water off the driveway, not onto it or under the edge.
- Don’t park heavy loads on the edge. The edge is the weakest point – park the boat trailer or dumpster in the middle, not the corner.
- Seal with care. A breathable sealer every few years can slow weathering and help with efflorescence, but sealing over a failing base just traps moisture.
- Inspect after winter. Walk the driveway in March and look for new dips, rocking units, or spreading edges before they get worse.
Prevention comes down to two things: keep water moving away, and keep the base sound. Our installs use Belgard and Techo-Bloc systems with base depths sized for Fremont’s soils and slopes.
Common Mistakes to Avoid
- Re-sanding over a soft base. It hides the dip for a season, then the water returns and the sand washes out again. Fix the base first.
- Patching a field dip without checking the drainage. In Fremont, the dip is usually water-driven. Patching the surface just moves the problem.
- Ignoring an edge that’s spreading. A restraint that’s pulling away lets every paver near it loosen. Repair the edge before the field follows.
- Assuming white haze means failed pavers. Efflorescence is usually cosmetic. Don’t pay for a rebuild because of a stain you can clean.
- Dropping in a bright new paver in the main sightline. It highlights the repair. Blend it in and let it weather.
- Letting a contractor dig deeper without a written price. That’s how a small repair turns into a surprise invoice.
- Pounding a heaved paver flat. The cause is water or roots – pounding the surface cracks the paver and doesn’t fix the reason it lifted.
See the difference
 Before
 After
 Before
 After
 Before
 After
When to Call a Professional
Some paver issues are worth a look from a trained crew even before you touch a shovel: a field dip that returns after you’ve re-sanded it twice, an edge that’s spread enough to see daylight, a soft, saturated base under a sunken section, rust stains from buried metal, or heaving that’s moved more than one or two pavers. If a repair turns out to need a base rebuild or drainage correction, that’s beyond a weekend fix and worth a written scope and price before anything gets dug. Barrett & Sons Construction Fremont offers free estimates in Fremont – call (833) 620-6162 for a free estimate. A live person answers the phone, and we’ll give you the honest read on whether you need a repair or a rebuild.
Frequently Asked Questions
Because the base or drainage under those pavers is failing, and surface fixes only hide it. The dip returns because water is still channeling under the paver and softening the bedding. Call (833) 620-6162 for an exact quote on a base or drainage fix – estimates are free.
Almost never. That white haze is efflorescence, mineral salts migrating to the surface, and it’s cosmetic – not a sign of structural failure. It brushes or washes off and fades with weather. The stains to take seriously are dark, damp patches that never dry and rust-colored streaks from buried metal.
Costs vary with what’s actually failing, but simple repairs (resetting a few pavers, re-sanding, tightening an edge restraint) sit in the low hundreds, while a base rebuild or drainage correction on an affected section runs higher. Call (833) 620-6162 for an exact quote on your driveway – we put the scope and price in writing before work starts, and estimates are free.
Cosmetic repairs usually don’t, but any job that changes drainage, grading, or how water sheds from a site can move into permit territory. We check with the city before we start and pull any permits required on eligible jobs. That keeps the job clean and legal.
Heaving almost always means water or roots pushing from below. A saturated base can swell, or tree roots can lift a section. Pounding the pavers flat cracks them and doesn’t solve the cause. The fix is finding the water source or root and resetting the section afterward. Call (833) 620-6162 for a free estimate on diagnosing and repairing heaving in Fremont.
Only if we find a bigger problem under the pavers – and only with a written change order showing you the new scope and price before we dig deeper. No surprise invoices at the end. That’s how every job works at Barrett & Sons Construction, backed by the written 90-Day Done Right Promise.
The Bottom Line
Driveway paver problems are symptoms, and the pavers themselves are rarely the cause. Sinking and rocking point to base and drainage. Spreading and tilting at the perimeter point to edge restraint. White haze is usually harmless efflorescence; dark wet patches and rust streaks are the stains that matter. Read the location and the clues before you spend a dollar, fix the cause rather than the surface, and get any “worse than expected” base issue in writing before work goes deeper. Do that and your Fremont driveway can stay flat and solid for years.
Call (833) 620-6162 for a free estimate on paver repair in Fremont. A live person answers, day or night. We’ll show you what’s actually failing and put the fix – and any extra cost – in writing before work starts. Ask anyone on your street, or look up the license number yourself. When the driveway’s holding water, you want a crew that comes back if something’s wrong. That’s the 90-Day Done Right Promise, on every job.
Written by the team at Barrett & Sons Construction Fremont.